- Example Setup
ASHS requires two input images, an output directory, and an atlas to build from. The SCC has some atlases installed within the ashs module, we will use those by calling a variable later on.
[cjahnke@scc4 ~]$ export TESTDIR=/projectnb/yourproject/testdir
[cjahnke@scc4 testdir]$ cd $TESTDIR
[cjahnke@scc4 testdir]$ tree .
 ./
 |--data/
   |--ETS_0003_T1W.nii
   |--ETS_0003_T2W.nii
 |--output/
|
- Running ASHS
ASHS can be run in a few modes: single core, single node, and cluster mode. The SCC supports cluster mode and your work will complete fastest using the full power.
First load the module and choose an atlas.
[cjahnke@scc4 testdir]$ module load ashs/20170223
[cjahnke@scc4 testdir]$ printenv | grep ATLAS
ATLAS_UPENNPMC=/share/pkg/ashs/atlas/atlas_upennpmc-20161128
ATLAS_UMCUTRECHT=/share/pkg/ashs/atlas/UMCUtrecht-7t-20160714
ASHS_ATLAS=/share/pkg/ashs/atlas
|
Run the application. You can use nohup (eg. "nohup $ASHS_ROOT/bin/ashs_main.sh {options} &" if you want to run the process in the background and capture the output in a file.
Note the following options and change as needed:
-Q Enables cluster mode-q "-P yourproject" Instructs SGE to use a specific project for accounting (required on BUMC).-I Subject ID (for stats output).-a Location of the atlas directory.-g Filename of 3D (g)radient echo MRI (ASHS_MPRAGE, T1w).-f Filename of 2D focal (f)ast spin echo MRI (ASHS_TSE, T2w).-q Working/output directory.
[cjahnke@scc4 testdir]$ $ASHS_ROOT/bin/ashs_main.sh \
 -Q \
 -q "-P yourproject" \
 -I ETS_0003 \
 -a $ATLAS_UPENNPMC \
 -g $TESTDIR/data/ETS_0003_T1W.nii \
 -f $TESTDIR/data/ETS_0003_T2W.nii \
 -w $TESTDIR/output
|
There are 7 stages and the code will submit numerous jobs on your behalf for each stage. You can check these with qstat. For example:
[cjahnke@scc4 testdir]$ qstat -u yourusername
job-ID  prior   name       user       state submit/start at     queue                     slots ja-task-ID
----------------------------------------------------------------------------------------------------------
6804007 0.11937 ashs_stg3_ cjahnke    r     02/23/2017 15:23:31 b@scc-bd8.scc.bu.edu       1
6804010 0.11937 ashs_stg3_ cjahnke    r     02/23/2017 15:23:31 q@scc-q01.scc.bu.edu       1
6804014 0.00000 sleep      cjahnke    hqw   02/23/2017 15:21:20                            1
|
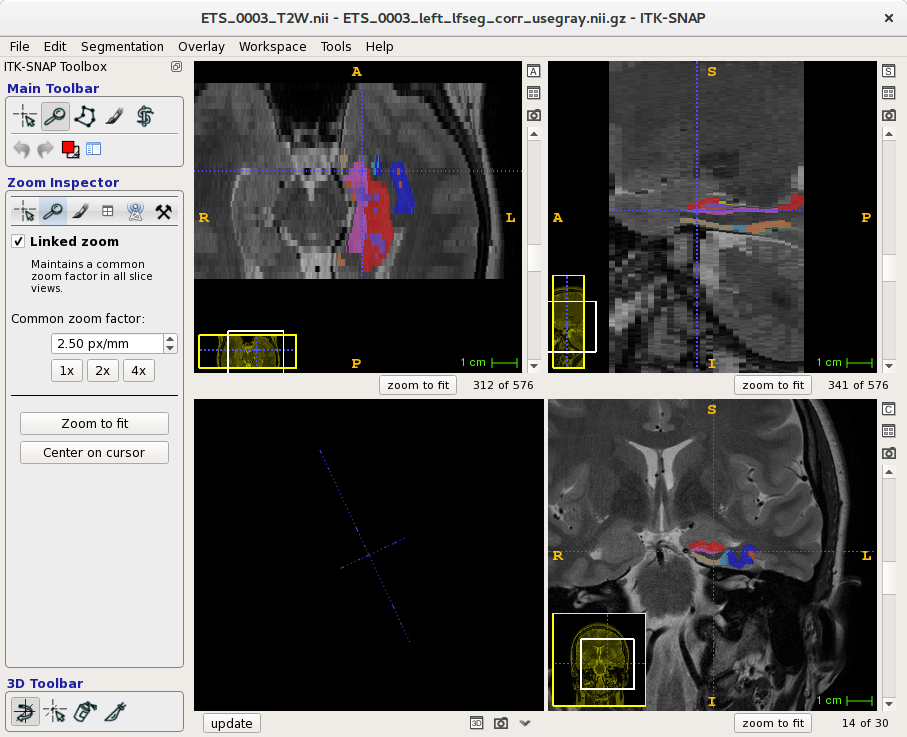
- View Results
You can view results with the itk-snap application, which is installed on SCC as a module.
Note that the results are based on the dimmensions of the spin image (T2).
[cjahnke@scc4 testdir]$ cd $TESTDIR
[cjahnke@scc4 testdir]$ module load ashs
[cjahnke@scc4 testdir]$ module load itk-snap
[cjahnke@scc4 testdir]$ itksnap \
 -g data/ETS_0003_T2W.nii \
 -s output/final/ETS_0003_left_lfseg_corr_usegray.nii.gz  \
 -l $ATLAS_UPENNPMC/snap/snaplabels.txt
|